Showing posts with label 2X4 Crafts. Show all posts

Tuesday, January 10, 2012

Magnetic Memo/Picture Frame Board with Glass Gem Magnets

Last Fall I garnered enough interest to start a monthly craft club at my house.  I plan the craft project(s) and then send my friends a supply list so everyone can put their own spin & touches on our creations. Then we gather once a month at my house to craft and create! It's so fun to feed off one another's energy and creativity, share supplies, and just generally catch up on one another's lives. 

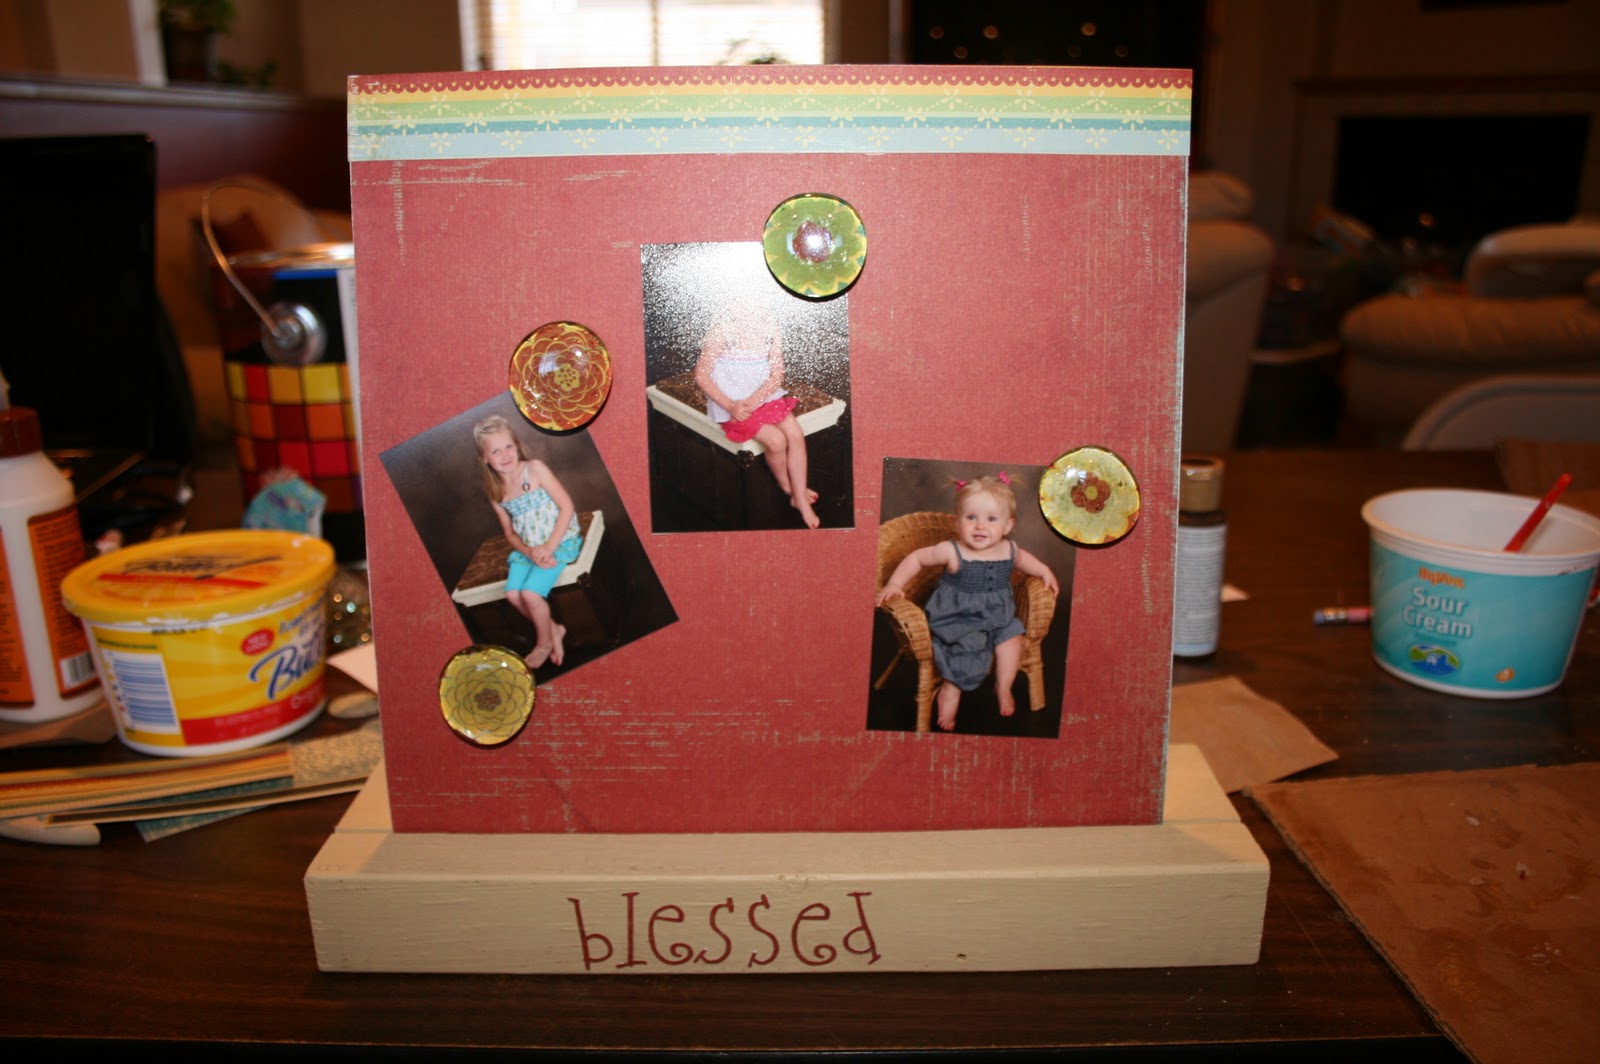
This is what my memo/picture board looks like!

Today we made a memo/picture frame out of sheet metal and some 2 X4's and magnets out of flat bottomed glass gems.  I had seen several examples of this craft but struggled to find clear directions on how to make it, so I'll share our tips & techniques to help the rest of you if you want to create 1 or 2 of them yourself. 


Supply List: 
  • Sheet Metal (a 24 X 36 piece was $9.52 in the plumbing department at Lowe's)
  • 2 X 4 (cut to your desired length--we made ours a couple of inches wider than our sheet metal pieces)
  • Large flat bottomed glass beads (a bag of about 30 cost $1 at the Dollar Tree-- the kind for filling vases with)
  • Scrapbook paper
  • tin snips 
  • paint
  • paint brush
  • magnets
  • Mod Podge
  • brayer
  • 9001 glue
  • 1 1/4 circle punch
  • scissors
  • sand paper and file
  • embellishments (ribbon, stickers, etc...)


Directions: 
  1. Cut 2 X 4 according to desired length.  We made ours 1 foot long. 
  2. Using a table saw, cut a 1/2" deep groove about 1" from the front edge. 
  3. Use tin snips to cut sheet metal according to desired length.  We made ours 10 X 10. 
  4. Sand edges of the 2 X 4 with sandpaper and sand the edges of the sheet metal with a file. 
  5. Paint 2 X 4. 
  6. Cover and/or embellish sheet metal piece with scrapbook paper.  We mod podged our paper onto the metal by applying mod podge to our sheets of paper and then adhering it to the metal. Lay it down carefully because it adheres quickly with little or no wiggle room. 
  7. Use a brayer to roll out any bubbles in your paper. 
  8. Using a circle punch, punch out your desired magnet designs out of scrapbook paper. 
  9. Apply a thin layer of mod podge to flat bottom of glass bead and to scrapbook paper. 
  10. Afix the bead and paper together and let it dry. 
  11. Using scissors trim excess paper from sheet metal and glass beads. 
  12. Apply 9001 glue to the back of  your gem/paper and add your magnet.  You only need to use a very small amount. 
  13. Give the 9001 glue sufficient time to dry (about 5 minutes). 
This craft will be perfect for displaying a favorite Bible verse, grocery list, new years resolutions, pictures or recipes. 

Steph's

Natalie's

Close-up view of my magnets
If you don't want to create the magnetic board the magnets themselves would make a nice small gift for a teacher, hostess, secret sister, etc...

Monday, October 31, 2011

Fall Crafting and Decorating


I can't believe tomorrow is November 1st-- that marks the date we start listening to Christmas music in our home :) So, I better get my fall craft project ideas posted before time runs out for folks to make them and enjoy them through Thanksgiving.

2 X 4 Blocks
Using 2 X4 scraps, acrylic paint, scrapbook paper and mod podge I made these blocks to spell out Fall.

A "graduated" 2 X4 block pumpkin.

I used some more 2 X4 scraps, paint, and a wood dowel to make some pumpkins.


Paper Pumpkins

Rounded Paper Pumpkins
Archiver's Accoridan Paper Pumpkin Project

Rounded Paper Pumpkins

Supplies:
  • Double sided 12 X12 scrapbook paper
  • 2 brads per pumpkin
  • paper cutter 
  • paper puncher
  • ribbon or paper for stem
Instructions:
1.  Cut 12 one inch strips of 12 X12 paper with paper cutter to make a large pumpkin. 
2.  Punch a circle at the bottom and top of each strip of paper.
3.  Cut a piece of ribbon or paper to make a round stem.  
4.  Bind strips together by using a brad. Also adhere stem to pumpkin using a top brad.   
5.  Slide strips apart one by one to make a pumpkin shape. 

Archiver's Accordian Paper Pumpkin Project/Tutorial

When I recently visited an Archiver's store, I picked up an instruction sheet on how to make this pumpkin decoration.  It is adorable but it was a struggle to make with their directions.  So, I decided supplement their directions with a tutorial video.  This should make it much easier for you to create one if you'd like. 

Supplies: 
  • Martha Stewart scoring board and scoring utensil
  • paper cutter
  • hot glue and hot glue gun
  • 1- 1 1/2" paper punch (you will need 20 circles)
  • scissors
  • leaves
  • twine/ribbon
  • eight 12 X 12 sheets of solid or coordinating double-sided scrapbook paper
  • 1 sheet for the stem
Instructions: 
View my uploaded Archiver's instruction sheet here and my tutorial movie below. 


Burlap Wreaths
Hallowee "Boo" wreath

I made the "Boo" wreath by spray painting 1 yard of burlap fabric black and cutting it into strips. I used pipe insulation to make a wreath and spray painted it black too.   Double tied the strips of burlap randomly around the wreath.  Modpodged scrapbook paper onto the chipboard letters and loosely tied them to the wreath with twine.  I hot glued the ends of the orange ribbon together to create a hanger. 
Fall Bubble Burlap Wreath
 I was inspired to make this burlap bubble wreath by this tutorial at Today's Fabulous Finds blog.  I again used pipe insulation to create the wreath but I wouldn't suggest it for this type of wreath.  Some of my stick pins aren't sticking into the foam very well, so I would spend the money on an actual foam wreath, if I were to make this again. 

And of course, a Grateful Banner
Grateful Banner

Here's the link to my banner/pennant tutorial to make your own.   

So from our home to yours-- Happy Fall ya'll :)  Now, enough crafting....I need to get back to cookbook typing, formatting and publishing!